Engraving Pen
Posted on
Click on the images to enlarge
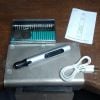
Portable Electric Engraving Tool
These things have been appearing in my social media feeds for some time now, so I thought I'd give one a try, with a view to seeing how it performs with wax.
They're pretty cheap from Ebay and such like, so it could have potential as starting kit for my students and beginners. There's never enough micromotors or pendant motors to go around at college; for a very small investment this could be a good solution.
The one I bought was £26. In the box was the Pen, a charging cable, an instruction leaflet and a box containing a bunch of diamond tools. There was three circular saw tools in the box too, but frankly they look like an injury waiting to happen.
The pen has three speeds, 5000 – 10000 – 18000 rpm apparently. They estimate use time at one hour. I haven't tested for that long yet, but I suspect that will come down significantly depending on speed and work.
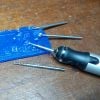
It accepts standard 2.3mm shaft burrs. There is no chuck as such, just insert the burr into the end of the pen until you feel resistance, then push more until the burr is gripped by what I assume is an internal rubber chuck.
Press the power button to set it running, again to increase the speed, a third time for top speed and a fourth to turn it off.
I found it quite pleasant to use; it's light and easy to hold. The 16mm diameter is slimmer than most micro drills, coupled with the light weight this gives plenty of control.
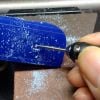
It has a little more torque than I was expecting, not that you need a lot of torque working with wax. It works well with standard burrs; I tried a range between 0.5 and 5.0mm and was satisfied with all of them. I preferred the slowest speed. As always the best way to use burrs with wax is to keep a light touch and don't let friction melt wax onto the burr. It even worked with a 1.2mm drill on a 2.3mm shaft, although I could feel it struggle a little at 5mm depth. Drilling a bit at a time worked better. Personally I usually drill with a hand chuck, as it's more controlled with wax, so this isn't a feature that would bother me.
If you have a pendant-motor or micro-motor, this probably isn't something for which you'll have much use, but it's handy for anyone on a limited budget or looking for something super-portable.
Not sure about the name, maybe Pen-motor?
I'll update this when I discover it's lifespan.
Update: December 2024, it's still working.
Russell Lownsbrough FIPG
29th December 2022


